Lapis Legit / Indonesian Layer Cake

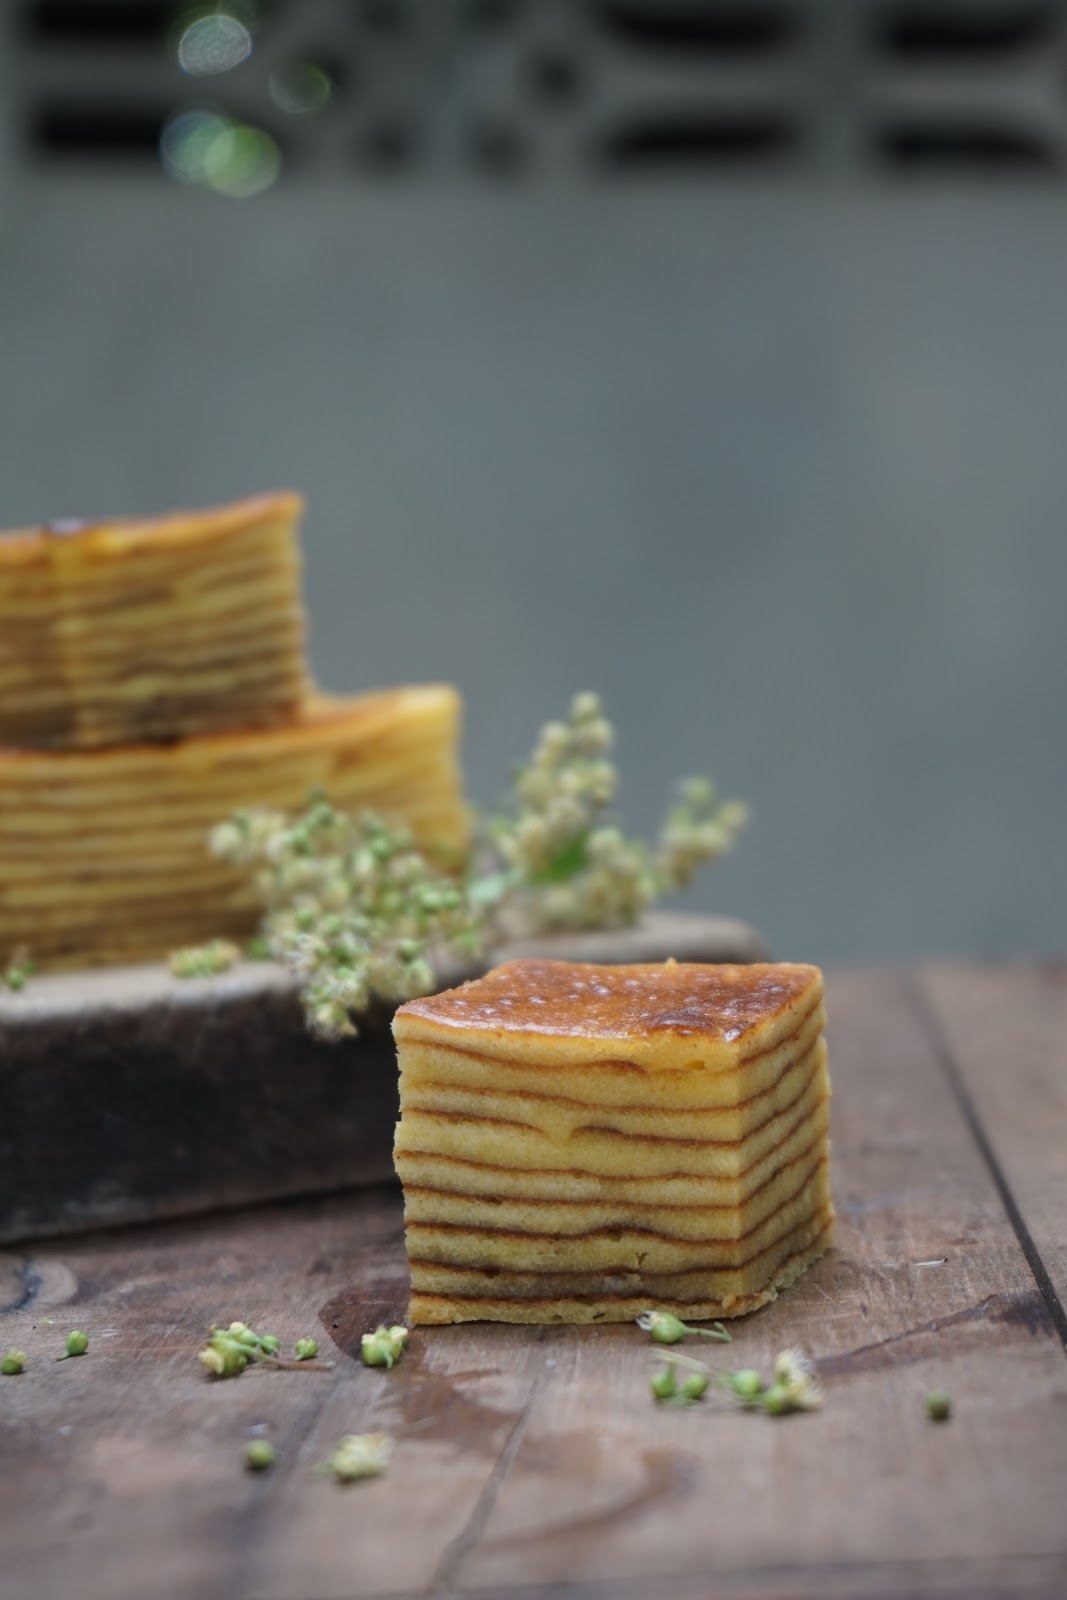
Lapis legit or legit layer cake is the original version of Indonesian layer cake. Nowadays there are so many kind flavors and patterns for layer cake, but still there are layers and layers although with pattern. For Lapis legit there is no pattern, just straight layers.
Making this cake need a lot of patience, because we baked layer by layer. Took a lot of time to make it. But it all worth it when you finish the layers and the moment to cut the cake is the moment that I always can't wait. Can't wait to see if the layers good enough or neat enough for each layers. That's pretty fun.
Oh..one more thing that make this cake is so special is need 30 egg yolks to make this delicate and moist cake. Sounds excessive maybe, but thats how it work.


LAPIS LEGIT/ INDONESIA LAYER CAKE
Serves 50 for mini slices
Ingredient :
30 egg yolks
400 g butter
300 g refined sugar / powdered sugar
100 g milk powder
7 tbsp condensed milk
1 tbsp vanilla extract
Instructions :
1. whisk butter and sugar for 10 minutes
2. Add egg yolks, milk powder, condensed milk and extract vanilla, whisk again for 5 minutes
3. Butter and flour the cake pan and put cake paper in cake pan just for the base pan
3. Pour a cup of batter for every layer, make sure you pour the same amount of batter for every layer to make nicely layers.
4. Bake in medium heat (175 C) for 1- 2 minutes, check regularly cause the layer easily burned.
5. After one layer cooked, spread 1 tsp butter on top flat presser and press gently the layer with that flat presser evenly, then pour another cup of batter. Repeat the same process until the batter runs out.
6. let it cool completely before removing out the cake from the pan.
July 5, 2017
Detail how to bake the layers :
As I mention before, making this layer cake need patience and a lot of time, because we need bake each layer one by one. Therefore when we made this cake again, I think I need too make the detail how we bake the layers. I will try to explain it as clearly as possible and I hope this will help you if you want to try to make this delicious cake.
First, The Oven.
We use Queen Electric Baking Pan, the old fashion one and of course our baking pan is old too. So I'm sorry if the baking pan looks horrible

Actually you can use any oven that you have at home, but we still use this baking pan cause the result is more soft and moist. We've tried to use oven before but it turn out a little bit tough and dry. But I think the problem is the oven (our oven is old too by the way), because some of my friends use oven and the result is great too. So you can use any kind of oven. Don't forget to heat the pan in the baking pan before pour our first layer.
Second, The Layers
As I wrote in instruction point 3 and 5, we need to pour the same amount of batter (a cup) for every layer to make nicely layers. After the pan is ready and heat enough, pour a cup of batter to the pan, spread gently with spoon until covered all over the pan bottom, then close the baking pan. Sometime it's only need 2 minutes for one layer but you still need to check regularly cause it's really easy to burn, depend on your oven, sometimes the heat is different for every baking pan or oven although we set on the same temperature. So I recommended to check every minute.


After one layer cooked, sometime the layer will have some bubbles, and we need to puncture the bubbles with anything that sharp, I use clean wood toothpick. The air inside the bubbles needs to be removed so that we can get a neat and straight layers.

After all the air gone, spread 1 tsp butter on top flat presser and press gently the layer with that flat presser evenly, make sure to press as gently as you can so we don't break the layers below.


After all the process is done, pour another butter, repeat the process until the batter runs out. Wait until cool completely before removing the cake from the pan.
Then we're done. I Hope this will help
Happy trying my friends


Comments
Post a Comment